The Complete K53
Study Guide
Everything You Need to Pass Your South African Learner's Licence Test — All Codes (Code 8, Code 10, Code 14 & More)
2026 Edition
k-53.co.za
Table of Contents
- Chapter 1: Introduction to the K53 Test
- Chapter 2: Vehicle Controls
- Chapter 3: Road Signs — Regulatory Signs
- Chapter 4: Road Signs — Warning Signs
- Chapter 5: Road Signs — Information and Guidance Signs
- Chapter 6: Road Markings and Traffic Signals
- Chapter 7: Rules of the Road
- Chapter 8: The Driving Test (K53 Practical)
- Chapter 9: South African Licence Codes
- Chapter 10: Quick Reference and Exam Tips
Chapter 1Introduction to the K53 Test
What Is the K53 Learner's Licence Test?
Before you can drive on South African public roads, you must first obtain a learner's licence by passing a theory test at a Driving Licence Testing Centre (DLTC). The test is based on the K53 standard, which has been validated over many years in many countries and is considered excellent for evaluating a driver's knowledge and ability.
A learner's licence is valid for 18 months from the date of issue. During this time, you may drive on public roads, including freeways, but only under the supervision of a person who holds a valid driving licence for the same class of vehicle. This supervisor must be seated next to you (or directly behind if they cannot sit next to you).
The K53 system is not just a test — it is a defensive driving methodology. The basic elements are:
- Search: Keep a constant lookout in all directions for possible hazards.
- Identify: Classify the type of hazard and how it may affect your speed or direction.
- Predict: Determine the dangers associated with the hazard.
- Decide: Choose a reaction that ensures the safety of all road users.
- Execute: Perform the decided action in a calm, controlled and decisive manner.
Test Structure and Pass Marks
The learner's licence theory test is a multiple-choice test consisting of 64 questions spread across three sections. At some testing centres you complete this test on a computer; at others it is a pen-and-paper test.
| Section | Number of Questions | Pass Mark | Pass Percentage |
|---|---|---|---|
| Rules of the Road | 28 | 22 correct | 79% |
| Road Signs, Signals and Markings | 28 | 23 correct | 82% |
| Vehicle Controls | 8 | 6 correct | 75% |
| Total | 64 | 51 correct | ~80% |
Which Learner's Licence Code Does the Test Cover?
When you apply for a learner's licence, you must specify which code you are testing for. The questions are tailored to that code:
- Learner Code 1 (Motorcycles): Questions focus on motorcycle-specific rules and controls.
- Learner Code 2 (Light Vehicles): The most common test — covers light motor vehicles up to 3 500 kg. This is what most people take before getting a Code B (old Code 7) or Code EB (old Code 8) driving licence.
- Learner Code 3 (Heavy Vehicles): Questions cover heavy vehicles, trucks, and articulated vehicles.
How to Apply
Minimum Age Requirements
- 16 years: Motorcycle without a sidecar, engine capacity not exceeding 125 cc.
- 17 years: Light motor vehicles with a mass not exceeding 3 500 kg.
- 18 years: All other vehicles, including motorcycles exceeding 125 cc.
What You Need When You Apply
- A valid South African ID book, ID card, or valid passport.
- Two recent passport-sized photographs (black-and-white or colour).
- Pass the eye test conducted at the testing centre (or bring a valid eye test from your optometrist).
- The applicable testing fee (varies by province and testing centre).
- Complete the application on form LL1.
Disqualifying Factors
You will not be able to obtain a learner's licence if:
- You have been disqualified by a court of law and that order is still in force.
- You already hold a valid licence for the same class of vehicle.
- Your licence has been suspended or cancelled and that period has not expired.
- You are addicted to narcotic drugs or the excessive use of intoxicating liquor.
- You have uncontrollable epilepsy, uncontrolled diabetes mellitus, or any condition causing muscular incoordination that prevents safe control of a vehicle.
Tips for Passing First Time
- Study daily for at least two weeks. Set aside 30-60 minutes each day. Consistent study is far more effective than cramming.
- Understand the rules, don't just memorise. Questions can be worded differently from what you expect. If you understand the reason behind a rule, you will answer correctly regardless of phrasing.
- Focus heavily on road signs. With 28 questions and a pass mark of 23, road signs is the strictest section. Learn all regulatory signs first as they carry legal force.
- Practice with mock tests. Use online practice tests at k-53.co.za to simulate real test conditions. Track your weak areas and revisit them.
- Learn signs in context. When you are a passenger, look at road signs and mentally recite their meaning.
- On test day, read every question carefully. Some answer choices look similar but differ in one key detail such as a distance or specific condition. Do not rush.
- Get enough sleep the night before and arrive at the testing centre early.
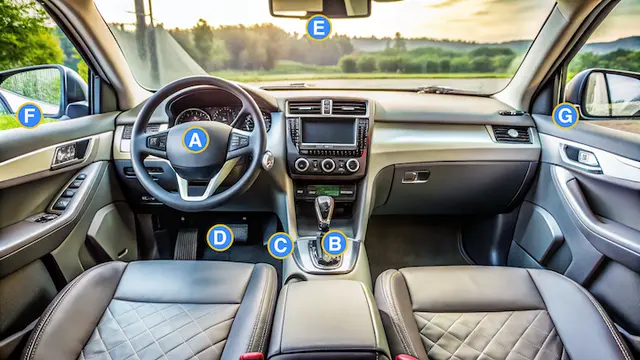
Chapter 2Vehicle Controls
The vehicle controls section of the learner's test has 8 questions, and you need 6 correct to pass. You must know the function of every vehicle control and the correct combinations for different driving actions.
Light Motor Vehicle Controls (Code B / old Code 7 & Code EB / old Code 8)
| Control | Function |
|---|---|
| Steering Wheel | Used to maintain or change direction. Keep both hands on the wheel in the ten-to-two or quarter-to-three position, except when changing gears or giving hand signals. To turn left, turn the wheel anti-clockwise; to turn right, turn the wheel clockwise. |
| Clutch Pedal | Used to disengage the drive between the engine and the gearbox in order to change gears. Automatic vehicles do not have a clutch pedal. |
| Foot Brake Pedal | Used to slow down or stop the vehicle. Apply timeously, smoothly and progressively using the right foot, without locking the wheels. |
| Accelerator Pedal | Push down to increase speed; release to reduce speed. |
| Gear Lever | Used to select or change gears. Works with the clutch pedal in manual vehicles. |
| Parking Brake (Handbrake) | Used to keep the vehicle stationary when parked or stopped. Always depress the ratchet release button when applying the handbrake. Must be applied whenever the vehicle is parked or stopped for any length of time. |
| Direction Indicators | Used to signal your intention to turn left or right. Shift the lever in the same direction you intend to turn the steering wheel. Always ensure the indicator cancels after completing a manoeuvre. |
| Hooter (Horn) | Used to warn other road users in an emergency. Not to be used unnecessarily or within 100 metres of a "no noise" sign. |
| Rear-view Mirror | Look in the mirror to check that it is safe behind your vehicle. Must be checked every 5 to 8 seconds while driving. |
| Exterior (Side) Mirrors | Used to check that it is safe behind and to the sides of your vehicle. |
| Windscreen Wipers | Used to clear the windscreen for clear vision while driving in rain or other conditions affecting visibility. |
| Headlight Switch | Controls parking lights, dipped beam (low beam), and main beam (high beam). Must be switched on between sunset and sunrise, or when visibility is less than 150 metres. |
| Hazard Warning Lights | Used only in an emergency or when the vehicle is standing in a hazardous position. |
Motorcycle Controls (Code A1/A / old Code 1/2)
| Control | Function |
|---|---|
| Handlebars | Used to maintain or change direction (equivalent of the steering wheel). |
| Gear Selector | Used to select or change gears (foot-operated). |
| Clutch Lever | Used to disengage the drive between the engine and the gearbox to select or change gears (hand-operated). |
| Handbrake (Front Brake) | Used to reduce speed and to keep the motorcycle stationary (hand-operated). |
| Foot Brake (Rear Brake) | Used to slow down or stop the motorcycle (foot-operated). |
| Accelerator Throttle | Turn towards you to increase speed; turn away from you to reduce speed. |
| Direction Indicators | Used to indicate intention to turn left or right. |
| Mirrors | Used to check behind and to the sides of the motorcycle. |
| Speedometer | Used to ensure compliance with the speed limit. |
Control Combinations
You must know which controls are used together for common driving actions:
| Action | Controls Used |
|---|---|
| Make the vehicle move | Accelerator, clutch, gear lever, release handbrake |
| Increase speed | Accelerator |
| Select gears | Clutch, gear lever |
| Stop or reduce speed | Foot brake |
| Turn or change direction | Direction indicator, steering wheel |
| Move off on an incline | Clutch, gear lever, accelerator, handbrake |
| Overtake another vehicle | Direction indicator, steering wheel, accelerator |
| Negotiate a sharp turn | Rear-view mirror, side mirrors, indicator, brake pedal, clutch, gear lever, steering wheel, accelerator |
| Check if safe to move | Mirrors (rear-view and exterior) |
| Hold the parked vehicle stationary | Parking brake (handbrake) |
Dashboard Instruments and Warning Lights
| Instrument / Light | Function |
|---|---|
| Speedometer | Shows the speed at which the vehicle is travelling. Check regularly to ensure you comply with speed limits. |
| Tachometer (Rev Counter) | Shows the engine speed in revolutions per minute (RPM). Helps determine when to change gears. |
| Fuel Gauge | Shows the amount of fuel in the tank. Never allow the tank to run completely empty. |
| Temperature Gauge | Shows the engine coolant temperature. If the needle moves into the red zone, stop safely and switch off the engine to prevent overheating damage. |
| Odometer | Shows the total distance the vehicle has travelled. |
| Oil Pressure Warning Light | Illuminates when oil pressure is critically low. Stop immediately and check oil level. |
| Battery/Charge Warning Light | Indicates the battery is not charging. May indicate a faulty alternator or broken fan belt. |
| Brake Warning Light | Illuminates when the parking brake is engaged or when there is a brake system fault. |
| ABS Warning Light | Indicates a fault in the Anti-lock Braking System. |
| Engine Warning Light | Indicates an engine management fault. Have the vehicle checked as soon as possible. |
| Temperature Warning Light | Illuminates when the engine is overheating. Stop safely as soon as possible. |
Heavy Vehicle Additional Controls (Code C1/C / old Code 10/13)
Heavy vehicles have additional controls not found in light motor vehicles. You must know these for the Learner Code 3 test and for the practical driving licence tests for Code C1, C, EC1, and EC.
| Control | Function |
|---|---|
| Air Brake — Service Brake | The primary foot-operated brake system on heavy vehicles. Uses compressed air to actuate brake chambers at each wheel. Apply progressively and release smoothly. |
| Air Brake — Park (Spring) Brake | The parking brake on heavy vehicles, operated by a yellow diamond-shaped control valve. Holds the vehicle stationary by spring pressure. Must always be applied when the vehicle is parked. |
| Air Brake — Emergency Brake | Activates automatically if air pressure drops below a safe level, causing the spring brakes to engage. Prevents the vehicle from being driven with insufficient air pressure. |
| Air Pressure Gauge | Displays the air pressure in the primary and secondary air reservoirs. The vehicle should not be moved until air pressure is within the safe operating range (typically 690–830 kPa / 100–120 psi). |
| Differential Lock (Diff Lock) | Locks the rear axle differentials together to prevent wheel spin on slippery or off-road surfaces. Must be disengaged before returning to normal road driving. |
| Exhaust Brake / Retarder | An engine-braking device that slows the vehicle by restricting exhaust gas flow or using a hydraulic/electromagnetic retarder. Used on long downhill gradients to reduce wear on service brakes. |
| Wide-Angle (Convex) Mirrors | Fitted to detect vehicles and objects in the wide blind-spot areas alongside the truck. Must be checked before any lane change or turn. |
| Kerb Mirror (Cross-View Mirror) | A convex mirror on the left side near the A-pillar, used to see the kerb and pedestrians directly alongside and in front of the cab when turning left. |
| Front (Cab) Mirror | Positioned to allow the driver to see directly in front of and below the cab bumper — a critical blind spot for heavy vehicles. |
| Trailer Air Line Connections (Glad Hands) | Red (emergency/supply) and blue (service/control) couplings that connect the tractor's air brake system to the trailer. Must be correctly coupled before moving. The red line must be connected before the blue line. |
Chapter 3Road Signs — Regulatory Signs
Regulatory signs regulate and control the actions of road users. They prohibit or command road users to perform certain actions. Failure to obey a regulatory sign is a criminal offence punishable by a fine, imprisonment, or both. Regulatory signs are generally round in shape, with exceptions including the octagonal stop sign, the triangular yield sign, and the diamond-shaped pedestrian priority sign.
A sign with a yellow background is a temporary sign, used to indicate a change in normal circumstances such as roadworks, collision scenes, or temporary traffic accommodation.
 Regulatory signs overview
 Regulatory sign
 Regulatory sign
 Regulatory sign
 Regulatory sign
 Regulatory sign
 Regulatory sign
 Regulatory sign
Control Signs
Control signs tell you where to stop, where to yield, in which direction to drive, and what special rules apply. Permanent control signs are red and white, sometimes with black symbols.
| Sign Name | Description and Action Required |
|---|---|
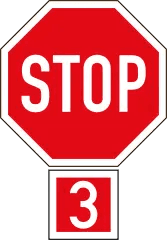
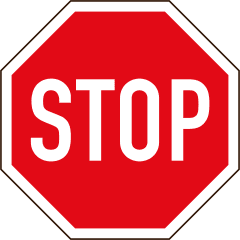
| Stop (R1.1) | Octagonal red sign. Bring your vehicle to a complete stop behind the stop line. If no stop line, stop in line with the sign. At a 3-way or 4-way stop, the vehicle that stopped first moves off first. Proceed only when safe. |
| Stop/Yield (R1.2) | If proceeding straight or turning right, stop. You may turn left without stopping if it is safe and does not interfere with cross traffic. |
| 3-Way Stop (R1.3) | Brings traffic from all three directions to a stop. The vehicle that stopped first moves off first. |
| 4-Way Stop (R1.4) | Brings traffic from all four directions to a stop. Bring your vehicle to a standstill behind the stop line. The vehicle that stopped first moves off first. |
| Stop/Go (R1.5) | Manually operated sign at roadworks. STOP on one side and GO on the other. Stop when STOP is displayed; proceed cautiously when GO is shown. |
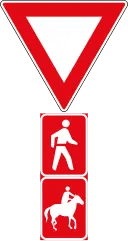
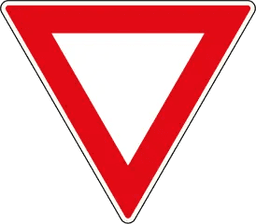
| Yield (R2) | Inverted triangle. Indicates you must yield to other traffic. Reduce speed and stop if necessary. Proceed only when safe. |
| Yield to Pedestrians (R2.1) | Give priority to pedestrians crossing or wanting to cross the road. Be ready to stop. |
| Yield at Traffic Circle (R2.2) | Yield to vehicles already in the circle or that will cross their yield line before you cross yours. The driver who reaches the yield line first may proceed first. |
| No Entry (R3) | Round red sign with white horizontal bar. No traffic may proceed past this sign. Usually found at the end of a one-way street or off-ramp. |
| One-Way Roadway (R4) | Arrow indicating direction of one-way traffic to the left, right, or straight ahead. Proceed only in the direction of the arrow. |
| Pedestrian Priority (R5) | Diamond shape. Area set aside for pedestrians. Vehicles may only enter to deliver goods, perform work, or attend emergencies. Maximum speed 15 km/h. Yield right of way to all pedestrians. |
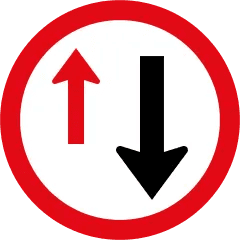
| Yield to Oncoming Traffic (R6) | Indicates a single carriageway ahead for use by vehicles from both directions. Yield to vehicles already in the carriageway. |
Command Signs
Command signs give instructions. They are round, blue and white. They specify actions that must be taken or indicate that specific road users may use a roadway that others may not.
| Sign Name | Description and Action Required |
|---|---|
| Minimum Speed (R101) | Do not drive slower than the speed indicated in km/h. Found where slow vehicles could disrupt traffic flow. |
| Keep Left / Keep Right (R103/R104) | Drive to the left or right of an obstruction where the sign is displayed. |
| Proceed Left/Right/Straight Only (R105-R107) | Drive only in the direction indicated by the arrow. |
| Turn Left/Right Only (R108/R109) | You must turn in the direction indicated at the next intersection. |
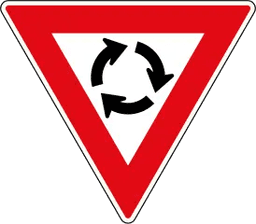
| Roundabout (R137) | You must move in a clockwise direction at the junction. Yield to vehicles approaching from the right within the roundabout. |
| Switch Headlamps On (R133) | Switch on your headlights in the dip (low beam) position. |
| Pay Toll (R132) | Gives you an opportunity to follow an alternative route or proceed and pay toll fees. |
| Pedestrians Only (R110) | The road or part of road may be used by pedestrians only. |
| Cyclists Only (R111) | The road or part of road may be used by cyclists only. |
| Cyclists and Pedestrians Only (R112-R115) | Road reserved for cyclists and/or pedestrians. Signs indicate which part of the road each may use. |
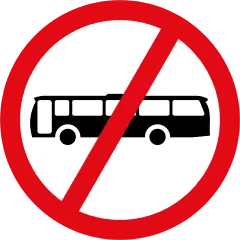
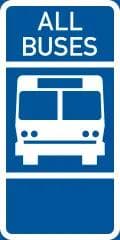
| Taxis / Buses / Goods Vehicles Only | Various command signs (R118-R131) indicate that the road is set aside for specific vehicle classes only. |
Prohibition Signs
Prohibition signs tell you what you may not do. They are round, white discs with a red border. Temporary versions have a yellow disc.
 Prohibition signs overview
 Prohibition sign
 Prohibition sign
 Prohibition sign
 Prohibition sign
 Prohibition sign
 Prohibition sign
 Prohibition sign
| Sign Name | What Is Prohibited |
|---|---|
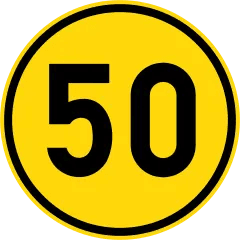
| Speed Limit (R201) | Do not exceed the speed indicated. The restriction applies from the position of the sign. |
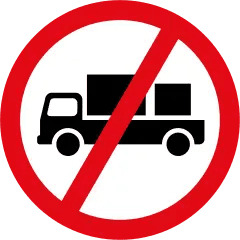
| Mass Limit (R202) | Vehicles with GVM or GCM exceeding the indicated mass in tons may not use this road. |
| Axle Mass Limit (R203) | Vehicles with any axle mass exceeding the indicated mass may not use this road. |
| Height Limit (R204) | Vehicles (including load) higher than the indicated height may not proceed. |
| Length Limit (R205) | Vehicles longer than the indicated length may not use this road. |
| Width Limit (R239) | Vehicles wider than the indicated width may not proceed. |
| No Left Turn Ahead (R209) | Vehicles may not turn left at the next intersection. |
| No Right Turn Ahead (R210) | Vehicles may not turn right at the next intersection. |
| No Left Turn (R211) | Vehicles may not turn left at this intersection. |
| No Right Turn (R212) | Vehicles may not turn right at this intersection. |
| No U-Turn (R213) | Vehicles may not turn around to face the opposite direction. |
| Overtaking Prohibited (R214) | No overtaking of any vehicles for the next 500 metres. |
| No Overtaking by Goods Vehicles (R215) | Heavy vehicles may not overtake other heavy vehicles for the next 500 metres. |
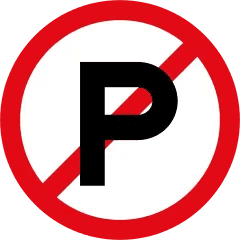
| Parking Prohibited (R216) | No parking at any time of day or night where this sign is displayed. |
| Stopping Prohibited (R217) | Do not stop unless to obey a traffic light, traffic officer, or to avoid a collision. |
| Excessive Noise Prohibited (R206) | Vehicles with high noise levels may not proceed. The vehicle hooter may not be used for 100 metres after the sign. |
| Hitch-hiking Prohibited (R207) | No pedestrian may attempt to be picked up. No driver may pick up passengers for 500 metres. |
| Pedestrians Prohibited (R218) | Pedestrians may not enter or cross a road where this sign is displayed. |
| Pedal Cycles Prohibited (R219) | Cyclists may not use the carriageway where this sign is displayed. |
| Motorcycles Prohibited (R222) | Motorcycles may not enter the part of the carriageway indicated. |
| Towed Vehicles Prohibited (R240) | No vehicle towing another vehicle or trailer may proceed past this sign. |
| Hawkers Prohibited (R241) | No hawking in the area at any time of day or night. |
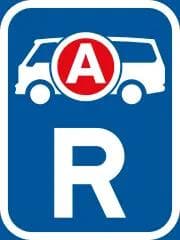
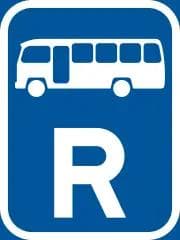
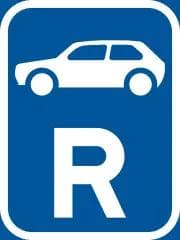
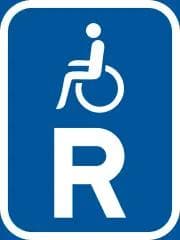
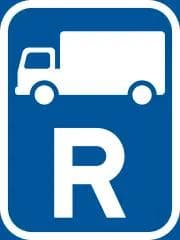
Reservation Signs
Reservation signs reserve lanes, roadways, or parking areas for specific classes of vehicles. They are rectangular, blue and white.
 Reservation signs overview
 Reservation sign
 Reservation sign
 Reservation sign
 Reservation sign
 Reservation sign
Roadway Reservations
- The lane on the left or right of a yellow line is reserved for the exclusive use of the vehicle class indicated (e.g., buses, taxis, public transport).
- A curved yellow line indicates the start of a reserved lane.
- A stop zone may be reserved for the exclusive use of the class of vehicle and organisation shown.
- Some reservations are temporary (e.g., during construction).
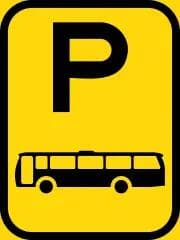
Parking Reservations
- General parking: Area reserved for parking.
- Class-specific parking: Reserved for the vehicle class shown (buses, taxis, motorcycles, disabled persons' vehicles, etc.).
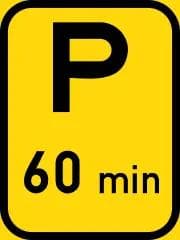
- Time-limited parking: Maximum duration shown (e.g., 60 minutes).
- Authorised vehicles: Reserved for specific authorised vehicles (police, diplomats, ambulances, etc.).
Comprehensive Signs
Comprehensive signs indicate that a comprehensive set of regulations must be adhered to on the roadway ahead.
Residential Area (Woonerf) — R403
- Access permitted, but you may not drive through without stopping to break your journey.
- Maximum speed: 30 km/h.
- Pedestrians have right of way at all times.
- Vehicles weighing more than 3 500 kg or with more than 10 passenger seats are not allowed, except for local access or delivery.
Dual-Carriageway Freeway Begins — R401
- Hand signals are not allowed on freeways (except in emergencies).
- If in the far right lane and the driver behind indicates intent to overtake, move safely to the next lane on the left.
- Do not accelerate while being overtaken.
- Stopping on a freeway is prohibited except in an emergency or designated stopping area.
- Learner drivers are allowed on freeways if accompanied by a properly licensed driver.
Single-Carriageway Freeway Begins — R402
The following are not allowed on a freeway:
- Pedestrians
- Animal-drawn vehicles
- Animals (unless in a reserved parking/stopping area)
- Pedal cycles, motorcycles 50 cc or less, motor tricycles, motor quad bikes
- Vehicles 230 kg or less adapted for disabled people
- Electric motorcycles
- Tractors (unless doing freeway maintenance)
Selective Restriction Signs
These are displayed beneath other regulatory signs to indicate that the regulatory sign applies only at certain times, to certain vehicles, in certain directions, or under certain conditions.
| Type | Example |
|---|---|
| Time-limited | Applies during the times shown (e.g., 07:00-09:00 and 16:00-18:00) |
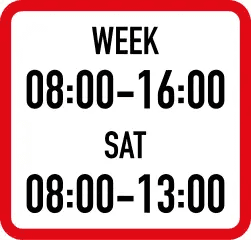
| Day/time-limited | Applies on specific days and during specific times |
| Daytime only | Applies during daytime only |
| Night-time only | Applies at night only |
| Direction-specific | Applies only when proceeding left or right |
| Vehicle-specific | Applies only to minibuses, motorcycles, goods vehicles, etc. |
| Distance-limited | Applies for the next specified distance (e.g., 5 km) |
| Pay and display | Parking requires payment; display receipt on vehicle |
De-restriction Signs
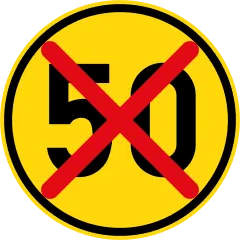
A red cross over a road sign indicates that a restriction, command, or set of regulations no longer applies from that point. Examples include:
- End of toll road
- Headlights no longer required to be on
- Vehicle mass restriction no longer applies
- End of lane-use reservation
- End of dual-carriageway freeway (freeway rules no longer apply)
- End of single-carriageway freeway
- End of residential area
Chapter 4Road Signs — Warning Signs
Warning signs alert road users in advance to dangerous conditions on or next to the road. They are generally triangular with a red border and white background. Temporary warning signs have a yellow background. Warning signs do not carry legal force in the same way as regulatory signs, but ignoring them is dangerous.
 Warning signs overview
 Warning sign
 Warning sign
 Warning sign
 Warning sign
 Warning sign
 Warning sign
 Warning sign
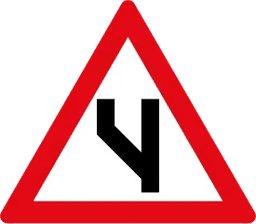
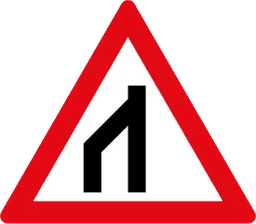
Road Layout Warnings
These signs warn of changes in road layout ahead such as intersections and junctions.
| Sign | Meaning and Action |
|---|---|
| Crossroad (W101) | A crossroad is ahead. Approach cautiously, look carefully, and be ready to stop if cross-traffic requires it. |
| Priority Crossroad (W102) | You are approaching an intersection where you have right of way. The thicker leg indicates the priority road. Still approach cautiously. |
| Secondary Crossroad (W103) | You must yield to cross-traffic. The thicker leg indicates the priority road. |
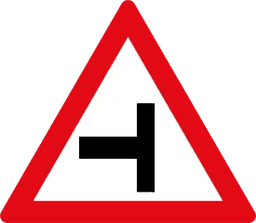
| T-Junction (W104) | The road ends and you must turn left or right. Slow down and look for cross-traffic. |
| Skew T-Junction (W105/W106) | Another road meets yours at an angle. Look out for cross-traffic and be prepared to stop. |
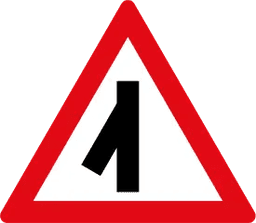
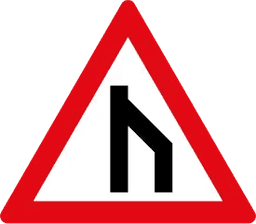
| Side Road Junction (W107/W108) | Another road joins yours from the left or right. Slow down and look for traffic at the intersection. |
| Staggered Junctions (W109/W110) | Two roads join yours within a short distance from opposite sides. Be prepared to stop or turn. |
| Sharp Junction (W112/W114) | Traffic may merge from the left or right at sharp angles. Drive at a safe speed. |
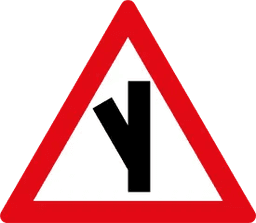
| Y-Junction (W115) | The road forks into two. Decide in time which road to take. |
| End of Dual Roadway (W116/W117) | The one-way roadway is ending and approaching vehicles will use the same carriageway. Position your vehicle safely. |
| Beginning of Dual Roadway (W118/W119) | The single carriageway is ending and you will enter a one-way road. Overtaking will be safer after this point. |
Direction of Movement Warnings
These warn of changes in vehicle travel direction ahead, such as curves and bends.
| Sign | Meaning and Action |
|---|---|
| Traffic Circle (W201) | A traffic circle is ahead. Slow down to stop or drive around the circle at a safe speed. Vehicles within the circle have right of way. |
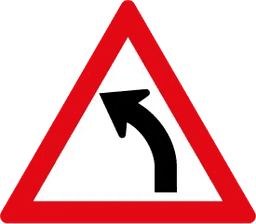
| Gentle Curve (W202/W203) | A gentle curve to the left or right. Drive at a speed that allows you to take the curve safely. |
| Sharp Curve (W204/W205) | A sharp curve to the left or right. Slow down significantly. |
| Hairpin Bend (W206/W207) | A very sharp U-shaped curve. Slow down to take it safely or stop within the distance you can see. |
| Winding Road (W208/W209) | A series of curves ahead. Slow down. There may be multiple curves without further warning. |
| Combined Curves (W210/W211) | Two sharp curves in opposite directions. Slow down enough to round both curves safely. |
| Two-Way Traffic (W212) | The one-way road will become two-way. Be more careful when overtaking. |
| Lane Ends (W214/W215) | The road narrows by a full lane. Change to the continuing lane in good time. |
| Concealed Driveway (W216-W218) | Hidden driveways enter the road. Slow down to be able to stop or yield. |
Road Condition and Surface Warnings
| Sign | Meaning and Action |
|---|---|
| Steep Descent (W323) | The road descends steeply. Allow for longer stopping distance. Change to a lower gear if necessary. |
| Steep Ascent (W322) | The road climbs steeply. You may not cross a no-overtaking line to overtake a slow-moving vehicle. |
| Gravel Road Begins (W325) | Tar road ends and gravel begins. Slow down. Steering will be lighter and stopping distance longer on gravel. |
| Gravel Road Ends (W363) | The gravel road ends and a tarred road begins ahead. |
| Narrow Bridge (W326) | Road narrows at a bridge. Slow down and try not to cross at the same time as an oncoming vehicle. |
| One Vehicle Width Structure (W327) | Only one vehicle at a time can pass. If oncoming traffic, stop at least 6 metres from the structure and yield. |
| Road Narrows Both Sides (W328) | Keep well to the left. Oncoming vehicles will pass close. |
| Road Narrows One Side (W329/W330) | The road narrows from the left or right side. Adjust your position. |
| Uneven Road (W331) | Depression, ridge, or potholes ahead. Slow down. |
| Speed Humps (W332) | Speed humps ahead. Slow down and obey any speed limit sign. |
| Slippery Road (W333) | Unusually slippery conditions, especially when wet. Avoid sudden braking or harsh steering for the next 2 km. |
| Falling Rocks (W334/W335) | Rocks could fall onto the road, especially after rain. Slow down to stop within sight distance. |
| Drift (W350) | Water crosses the road ahead. Go very slowly. Test brakes afterwards. |
| Crosswinds (W349) | Strong crosswinds ahead. Be prepared for the vehicle to be pushed off course. |
| Reduced Visibility (W354) | Fog, mist, or smoke may reduce visibility. Slow down. |
| Surface Step (TW340/TW341) | One side of the carriageway is higher than the other. Do not make sudden steering motions. |
| Soft Shoulder (TW342) | The road shoulder is soft and could be dangerous. Do not drive or stop on it. |
Moving Hazards
These signs warn of people, animals, or vehicles that may suddenly enter the road.
| Sign | Meaning and Action |
|---|---|
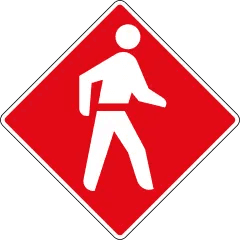
| Pedestrian Crossing (W306) | Demarcated pedestrian crossing ahead. Slow down, stop if a pedestrian is waiting. Do not overtake vehicles that have stopped at the crossing. |
| Pedestrians (W307) | Pedestrians may be crossing the road for the next 2 km. |
| Children (W308) | Children ahead, especially near schools. Slow down immediately. |
| Cyclists (W309) | Cyclists may be using or crossing the road for the next 2 km. |
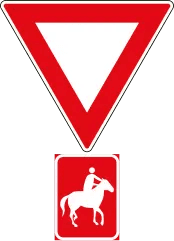
| Horses and Riders (W356) | Horses and riders may be on the road ahead. |
| Cattle / Sheep / Horses (W310-W312) | Free-ranging domestic animals on the road for the next 2 km. |
| Wild Animals (W313) | Wild animals may be on or crossing the road, especially on rural roads. |
| Elephants / Warthogs / Hippos (W357-W359) | Specific large wildlife may be present, especially in wildlife sanctuaries. |
| Agricultural Vehicles (W352) | Tractors or slow-moving agricultural vehicles may cross or enter the road. |
Construction and Temporary Warnings
 Temporary signs overview
 Temporary warning
 Temporary warning
 Temporary warning
 Temporary warning
 Temporary warning
| Sign | Meaning and Action |
|---|---|
| Road Works (TW336) | Temporary construction or maintenance works ahead. Slow down and look for traffic regulators. |
| Grader Working (TW337) | A grader is working on the carriageway. The full width of the road may not be available. |
| Loose Stones (TW338) | Loose stones or gravel on the road. Oncoming vehicles could throw up stones. Braking capacity may be affected. |
| Collision (TW353) | An accident scene ahead. Road may be obstructed with wreckage, injured persons, or emergency teams. |
| Truck Crossing (W344/W345) | Heavy vehicles regularly cross or join the road. Look for spilt material on the road. |
| General Warning (W339) | Danger of some kind ahead. Usually has an explanatory plate beneath it. |
| Traffic Signals Ahead (W301) | Traffic lights ahead. Slow down and be ready to stop. |
| Stop Sign Ahead (W302) | A stop sign ahead that may not be visible in time. Slow down and prepare to stop. |
| Yield Ahead (W303) | A yield sign ahead. Slow down and be ready to stop if necessary. |
| Railway Crossing (W318) | Railway crossing ahead. Slow down and look left and right for trains. Stop if a train is approaching. Do not stop within the railway reserve. |
| Tunnel (W319) | Tunnel ahead. Switch headlights on (dipped beam) and do not overtake inside the tunnel. |
| Gate / Boom (W314) | Gate or boom across the road ahead. Be prepared to stop if gates are closing or closed. |
Hazard Marker Plates
These indicate the position of a hazard or obstruction on or next to the roadway.
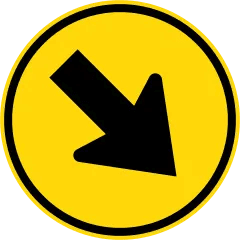
- Danger plate: Pass the hazard on the side to which the arrowhead points.
- Sharp curve chevron: Marks the place and direction of a sharp bend.
- T-junction chevron: Outward pointing arrows indicate you must turn left or right.
- Dead-end chevron: Inward pointing arrows indicate the road ends; you must turn back.
- Temporary barricade: Road is temporarily closed. Do not proceed past the sign.
- Railway crossing marker: White cross indicating a railway crossing. An extra lower plate indicates two or more railway lines.
- Overhead structure plate: Marks the position of an overhead structure across the road.
Chapter 5Road Signs — Information and Guidance Signs
 Information signs overview
 Information sign
 Information sign
 Information sign
 Information sign
 Information sign
 Information sign
 Restriction signs
Information Signs
Information signs supply general information to help you plan your road and lane usage. They are usually rectangular.
| Sign | Meaning |
|---|---|
| Freeway Exit Countdown (IN1-IN3) | Each white bar represents 100 metres to the exit. Three bars = 300 m, two = 200 m, one = 100 m. |
| Cul-de-sac / No Through Road (IN4-IN6) | The road ahead (or to the left/right) does not continue. A red bar indicates the blocked direction. |
| Right of Way (IN7) | You have right of way at the intersection ahead. Do not slow down unnecessarily, but make sure other traffic will yield. |
| Park and Ride (IN9/IN10) | Park your car here and take a bus or train for the next part of your journey. |
| Co-ordinated Traffic Signals (IN14) | Signals on this route are synchronised. Maintain the indicated speed for green at all subsequent intersections. |
| Multi-phase Traffic Signals (IN15) | Signal sequence at this intersection is not standard. Wait for your green; do not move off when opposing traffic moves. |
| Information Centre (IN12) | An information office or notice board is available here. |
| Modal Transfer (IN17-IN19) | A point where you can change your mode of transport (e.g., car to train or bus). |
Supplementary Information Plates
These are displayed below warning or regulatory signs to provide additional detail:
- Recommended speed for a curve
- Distance ahead (e.g., "200 m ahead")
- Applies for the next specified distance (e.g., "for the next 12 km")
- Specific hazard type (e.g., "blind people", "accident")
- Vehicle class affected (e.g., "goods vehicle")
Guidance and Direction Signs
Guidance signs help with navigation by indicating routes, distances, and destinations. They use different colour backgrounds:
| Background Colour | Type of Route |
|---|---|
| Blue | Freeway direction signs |
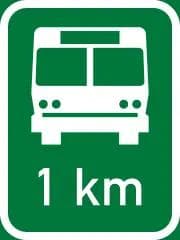
| Green | National and regional route direction signs |
| White | Local direction signs (within a town or city) |
| Brown | Tourism and attraction signs |
| Yellow | Temporary direction signs |
Location Name Symbols
These give the names of towns, streets, rivers, freeways, interchanges, and conservancy areas. Different shapes identify the type of location (river, toll road, freeway, interchange, etc.).
Direction Sign Symbols
These indicate the nature of the destination:
- Railway station, bus terminus, airport, harbour, heliport
- Freeway, toll route, alternative route, detour direction
- City centre/CBD, shopping centre, industrial area, power station, mine
- Parking area, park-and-ride, mini-bus rank, pick-up point
- Library, school, fire station, border post
Route Markers
- National route: Pentagon-shaped with N prefix (e.g., N1)
- Regional route: Square with R prefix (e.g., R45)
- Metropolitan route: Circle with M prefix (e.g., M1)
Freeway Signs
Freeway direction signs are blue and guide you along freeways.
- Pre-advance exit direction (GA1): About 2 km before an off-ramp. Move to the left lane if you want to exit.
- Advance exit direction (GA2): About 1 km before an off-ramp.
- Supplementary exit direction (GA2/3): About 500 m before exit. You should be in the far left lane by now.
- Exit direction (GA3): Marks the exact exit point. Only leave if in the left lane.
- Gore exit (GA4): Marks the separation between the off-ramp and main road. Pass left of this sign to exit, right to continue.
- Confirmation (GA7): Appears about 750 m after entering a freeway and every 5-10 km, confirming destinations and distances.
Tourism Signs
Tourism signs have a brown background and indicate tourist attractions, amenities, and facilities. The symbol on the sign shows the type of attraction or service:
- Nature and wildlife: National parks, nature reserves, game reserves, botanical gardens, forests, waterfalls, caves, viewpoints
- Sports and recreation: Golf courses, swimming pools, sports stadiums, motor racing, fishing, horse racing, hiking trails
- Cultural and historical: Museums, historic places, monuments, archaeological sites, theatres
- Accommodation: Hotels, guest houses, B&Bs, camping sites, chalets, youth hostels
- Services: Restaurants, filling stations, workshops, hospitals, police stations, fire stations, toilets, drinking water
- Transport: Parking areas, car washes, rest areas (Class 1, 2, and 3)
Chapter 6Road Markings and Traffic Signals
Road markings regulate, control, and warn traffic by defining carriageway and traffic lane limits and directing traffic. Like regulatory signs, it is an offence to disobey regulatory road markings.
Regulatory Markings
| Marking | Meaning and Action |
|---|---|
| Stop Line (RTM1) | A solid white line across the road at intersections. Stop with the front of your vehicle behind this line. If no stop sign, the stop line has the same meaning as a stop sign. |
| Yield Line (RTM2) | A broken white line across the road. Give way to anyone crossing your path. Even without a yield sign, you must give way. |
| Pedestrian Crossing (RTM3) | White stripes across the road. Give priority to pedestrians crossing or wanting to cross. |
| Block Pedestrian Crossing (RTM4) | A raised white block pattern. Same rules as standard pedestrian crossing. |
| No Overtaking Line (RM1) | A solid white line in the centre of the road. You may not drive with any part of your vehicle to the right of this line, except to access a property on the other side, exit such property, or pass a stationary obstruction — and only when safe. |
| No Crossing Double Line (RM2) | Two solid white lines. You may under no circumstances cross these lines, except to pass a stationary vehicle or obstruction in the road. |
| Painted Island (RM5) | A hatched or solid area on the road. You may not stop, park, or drive over the island, unless instructed by a traffic officer, to avoid a collision, or in an emergency. |
| Left Edge Line (RM4.1) | Yellow line on the left edge of the road. You may drive left of this line only when being overtaken, during daytime, and when persons and vehicles are clearly visible at 150 metres. |
| Parking Bay (RM6) | White lines marking a parking space. Park completely within the lines. |
| Exclusive Parking Bay (RM7) | Marked with a letter code indicating which vehicles may park: A (Ambulance), B (Bus), L (Loading), T (Taxi), F (Fire), P (Police), D (Defence), CD (Diplomatic), MB (Minibus), SOS (Emergency phone). |
| Mandatory Direction Arrows (RM8) | White arrows painted on the road before an intersection. You may only proceed in the direction indicated by the arrow in your lane. |
| Bus / Tram / Bicycle Lane (RM9/RM14) | Road marking indicating a lane reserved for specific vehicles. Do not drive in these lanes unless permitted. |
| Box Junction (RM10) | Yellow cross-hatched area at intersections. You may not stop on this marking unless entering the intersection to turn. |
| No Stopping Line — Solid Red (RM12) | You may not stop here at any time, except in an emergency. |
| No Stopping Line — Broken Red | You may not stop during the times indicated on the nearby sign. |
| No Parking Line — Solid Yellow (RM13) | You may stop briefly to load/unload goods or passengers, but you may not park. |
| No Parking Line — Broken Yellow | You may not park during the times indicated on the nearby sign. |
| Mini-circle Marking | A small, raised yellow and white circle in the centre of an intersection. Drive around it clockwise. |
Warning and Guidance Markings
| Marking | Meaning |
|---|---|
| Railway Crossing Ahead (WM1) | Painted on the road before a railway crossing. Slow down and be prepared to stop. |
| Lane Lines (GM1) | White dashed lines separating lanes going the same direction. Drive in the centre of your lane. |
| Dividing Lines (WM3) | White dashed lines separating two-way traffic. Vehicles on the other side are moving in the opposite direction. |
| Continuity Lines (WM2) | Warn that a lane will soon turn off. Yield to traffic that wants to change lanes. |
| Bifurcation Arrows (GM3) | Indicate an increase in the number of lanes ahead. Do not straddle lane markings. |
| Lane Reduction Arrows (WM6) | The number of lanes is being reduced. Change lanes in time. |
| No Overtaking Line Ahead (WM8) | A no-overtaking line is coming. Move back to the left lane before it starts. |
| Yield Control Ahead (WM5) | A yield sign is ahead. Slow down and be ready to stop. |
| Speed Hump (WM10) | A speed hump in the road. Slow down and release your brake before driving over it. |
Traffic Signals
Traffic signals regulate vehicular and pedestrian traffic. Failure to obey traffic signals is punishable.
Do not proceed past stop line
Stop if you can do so safely
Go if safe; yield to pedestrians
Drive carefully; yield to pedestrians
| Signal | Meaning and Action |
|---|---|
| Steady Red Disc | STOP. Do not proceed past the stop line. |
| Flashing Red Disc | Stop and may carry on when it is safe (same as a stop sign). |
| Flashing Red Arrow Left | After stopping, the driver may turn left if there is no traffic. Yield to pedestrians and oncoming traffic turning right. |
| Steady Amber (Yellow) Disc | WARNING. Stop, except where it cannot be done safely (i.e., you are too close to the line to stop). |
| Steady Amber Arrow | Stop and wait until the flashing green arrow shows you may go. |
| Steady Green Disc | PROCEED if it is safe. Give way to pedestrians and vehicles already lawfully within the intersection. |
| Flashing Green Arrow | You have right of way in the direction of the flashing arrow. |
| Steady Green Arrow | Shows the direction in which traffic must go (e.g., one-way streets). |
| Flashing Amber Disc | Drive on carefully, but yield to pedestrians. Pedestrians may cross. |
| Steady Red Pedestrian Figure | Pedestrians may not cross the road. |
| Flashing Red Pedestrian Figure | Pedestrians who have not yet entered the road must wait. Those already crossing must hurry across. |
| Steady Green Pedestrian Figure | Pedestrians may cross the road. |
| Railway Crossing Flashing Red | A train is coming. You may not proceed until the light stops flashing. |
Overhead Lane Direction Signals
- Green downward arrow: You may drive in this lane.
- Red cross: You may not drive in this lane. It may be open to vehicles travelling in the opposite direction.
- Yellow arrow (left or right): The lane is closed ahead. Leave the lane in the direction of the arrow.
Traffic Officer Hand Signals
Traffic officer signals take precedence over all other traffic signs and signals.
- Stop (front): Raised hand facing you means stop if approaching from the front.
- Stop (rear): Raised hand from behind means stop if approaching from the rear.
- Stop (both): Both arms raised means stop traffic from front and rear.
- Go/Proceed: Officer beckons you to proceed in the indicated direction.
Chapter 7Rules of the Road
The rules of the road section has 28 questions in the learner's test, with a pass mark of 22 correct (79%). This is the largest section and covers a wide range of topics.
General Rules
- Always obey the directions of a traffic or police officer. Their instructions overrule any road sign or rule of the road.
- Obey all rules of the road. Failure to do so is an offence.
- The rule of the road is to drive on the left half of the road.
- Drive off from a stationary position only when it is safe to do so, without causing danger to other traffic.
- It is a criminal offence to disregard the safety of people or property when driving, or to drive recklessly, negligently, or without reasonable consideration for other road users.
- The driver must be seated to maintain control of the vehicle and have a clear view of the road ahead.
- You may not operate a communication device (cellphone or two-way radio) while driving unless using a hands-free set or headset.
Following Distance
Keep a safe following distance behind the vehicle in front so you can stop or take evasive action if suddenly necessary.
| Vehicle Type | Minimum Following Time | Recommended Safe Time |
|---|---|---|
| Light Motor Vehicle (LMV) | 2 seconds | 3 seconds |
| Heavy Motor Vehicle (HMV) | 3 seconds | 6 seconds |
| Motorcycle | 3 seconds | 4-5 seconds |
- Visibility is poor (rain, fog, mist, dust, smoke)
- The road surface is wet or slippery
- Travelling at high speed
- Travelling on a loose surface (sand, gravel)
- Your vehicle is heavily loaded
- You are being tailgated (followed too closely)
- Towing a trailer, caravan, or other vehicle
- Driving in a bend or sharp curve
- You start to feel less alert or are distracted
Mirrors and Blind Spots
- Adjust the rear-view mirrors for maximum vision only while the vehicle is stationary.
- Check the rear-view mirrors every 5 to 8 seconds while driving.
- Check mirrors as you approach any potential hazard.
- Do not look in the mirrors for too long.
- Blind spots are areas not visible in the mirrors. Before signalling, changing lanes, or turning, check the blind spot by looking over your shoulder to the furthest point of the rear side window.
- Your wheels should always be straight when checking the blind spot.
Speed Limits
| Area / Vehicle Type | Speed Limit |
|---|---|
| Urban area (built-up area) | 60 km/h |
| Rural road (outside built-up area) | 100 km/h |
| Freeway | 120 km/h |
| Residential area (Woonerf) | 30 km/h |
| Pedestrian priority area | 15 km/h |
| Minibus carrying passengers exceeding 16 | 100 km/h (max) |
| Goods vehicle with GVM > 9 000 kg | 80 km/h (max) |
| Vehicle towing a caravan/trailer | 100 km/h (max) |
| Bus/minibus carrying more than 16 passengers | 100 km/h (max) |
Speed Limits by Licence Code
| Zone | Code B (old Code 8) — Light Vehicles | Code C1/C/EC (old Code 10/13/14) — Heavy Vehicles |
|---|---|---|
| Urban (built-up area) | 60 km/h | 60 km/h |
| Rural road | 100 km/h | 80 km/h |
| Freeway | 120 km/h | 100 km/h |
Overtaking
When You May NOT Overtake
- When overtaking is prohibited by a road sign or road marking
- When a vehicle has stopped at a pedestrian crossing
- On a blind rise, curve, or any area where your view of the road ahead is limited
- When it is not safe to do so
- On the shoulder or verge of the road
Overtaking on the Left
You may overtake on the left only when:
- The vehicle ahead is turning right or has indicated to turn right
- The road is a one-way road
- Traffic is in separate lanes and your lane is moving faster
- You may not cross the yellow left-edge line to overtake on the left
Being Overtaken
- When being overtaken, move over safely to the left to allow the other vehicle to pass.
- Do not accelerate until the other vehicle has passed.
- On a freeway, if you are in the far right lane and the driver behind indicates intent to overtake, move safely to the next lane on the left.
Divided Roads
- When a painted marking or physical barrier divides a road, always stay on the left of the division.
- Only cross a division if there is an opening or space allocated for this action.
- It is a violation to drive across a solid dividing marking.
- You may only drive across a broken dividing marking to overtake another vehicle or make a U-turn.
Driving Signals and Hand Signals
Driving Signals
- Signal your intention early enough to warn others, using indicators, stop lights, or hand signals.
- Make sure your signals can be clearly seen from the front, behind, and from the side.
- Use brake lights to indicate you are slowing down or intending to stop.
- Signal whenever you intend to reduce speed suddenly, turn, change lanes, or move to the left or right.
- As the last thing before changing lanes, check the blind spot on the side you will be moving to.
- After completing a manoeuvre, make sure the direction indicator has cancelled.
Hand Signals
You must be able to give the following hand signals. Hand signals may not be used on freeways (except in emergencies).
Right arm out, forearm downward, circular anti-clockwise motion
Right arm extended horizontally, palm forward
Right arm out, forearm vertical upward, palm forward
Right arm out, move arm up and down
| Signal | How to Give It |
|---|---|
| Left Turn | Extend your right arm out of the window, turn your forearm downward from the elbow, and move it in a circular anti-clockwise motion. (For motorcycles: extend left arm horizontally with palm forward.) |
| Right Turn | Extend your right arm horizontally from the shoulder with the palm of your hand facing forward. |
| Stop or Sudden Reduction in Speed | Extend your right arm horizontally with the forearm vertical and upward, palm facing forward. |
| Slow Down | Extend your right arm out of the window and move it up and down. |
| Please Overtake | Extend your right arm out of the window and wave the vehicle behind you forward. |
Turning at Intersections
Turning Left
- Before turning left, indicate in good time and keep as close as possible to the left side of the road.
- Obey yellow mandatory direction arrow markings.
- Move in accordance with white markings indicating mandatory direction arrows.
Turning Right
- Before turning right, indicate in good time and keep as close as possible to the right side of the road (or centre of a two-way road).
- Before starting the turn into a two-way road, cross the centre line so that you turn into the left side of the road.
Four-Way Stop Procedure
- Come to a complete stop behind the stop line.
- Yield to pedestrians and vehicles that arrived at the intersection before you.
- The vehicle that stopped first moves off first.
- At a scholar patrol crossing, proceed only when the stop sign has been removed and it is safe.
Parking Rules
- Always park within a demarcated bay and never on a sidewalk or verge.
- Wheels must not be more than 450 mm from the kerb.
Parking Distances
| You May Not Park Closer Than | To |
|---|---|
| 5 m | An intersection |
| 6 m | A pedestrian crossing, a bridge, or a constricted road |
| 9 m | No stopping in, on, or closer to a railway crossing |
| 1 m | Another vehicle already parked (next to a demarcated bay) |
| 1.5 m | A fire hydrant or a driveway entrance |
Other No-Parking Places
- In any no-stopping area
- On a pavement or sidewalk
- In a designated bus, taxi, loading, fire, police, diplomatic, defence, or SOS zone
- Alongside another parked vehicle (double parking)
- On the roadway side of a parked vehicle
Stopping Rules
You may not stop your vehicle on a public road in a manner that could obstruct traffic or cause danger unless it is an emergency or accident.
No-Stopping Places
- On a painted island
- Within an intersection
- On a pedestrian crossing
- On a railway crossing
- On a bridge, in a tunnel, or in an underpass
- Next to a solid red line or within a no-stopping zone
- On a freeway (except in an emergency or designated area)
Compulsory Stops
- At a stop sign or stop line
- At a red traffic signal
- When directed by a traffic or police officer
Pedestrians' Right of Way
- Always give way to pedestrians at pedestrian crossings.
- In a pedestrian priority area, pedestrians have right of way at all times.
- If a vehicle collides with a pedestrian, the driver will be prosecuted regardless of who had right of way.
- Never overtake a vehicle that has stopped at a pedestrian crossing.
- In a residential area (Woonerf), you must give way to all pedestrians.
Vehicle Lights
When to Use Headlights
- Between sunset and sunrise
- Whenever visibility is less than 150 metres
- Motorcycle headlights must be on at all times while riding on a public road (even during the day)
Types of Lights
| Light Type | Details |
|---|---|
| Main Beam (Bright) | Must illuminate objects at least 100 m ahead. Do not use when the brightness would cause glare to approaching traffic. Must strike the road not more than 45 m ahead. |
| Dipped Beam (Low) | Must illuminate objects at least 45 m ahead. Use when approaching oncoming vehicles or following another vehicle. |
| Parking Lights | Use at night only when the vehicle is parked outside a demarcated area or more than 12 m from a lit street lamp. Do not drive with only parking lights. |
| Brake Lights | Must emit a red light visible in normal sunlight at 30 m. Activate automatically when you apply the foot brake. |
| Fog Lights | Use in conditions of poor visibility caused by fog, mist, dust, smoke, or snow. |
| Hazard Warning Lights | Use only in an emergency or when the vehicle is in a hazardous position. |
| Spot Lamps | No more than two after-market spot lamps may be fitted. |
| Number Plate Lamp | Must illuminate the number plate so it is readable from at least 20 m. The lamp must not face to the rear. |
Freeways
Not Allowed on Freeways
- Pedestrians, cyclists, animal-drawn vehicles, animals
- Motorcycles 50 cc or less, motor tricycles, motor quad bikes
- Vehicles adapted for disabled persons weighing 230 kg or less
- Electric motorcycles, tractors (unless doing maintenance)
You May Not Stop on a Freeway Except
- In an emergency
- In a designated stopping area
Other Freeway Rules
- Hand signals are not allowed on freeways (except in emergencies).
- Learner drivers are allowed on freeways if accompanied by a properly licensed driver.
- If in the right lane and someone wants to overtake you, move safely to the left.
- Do not accelerate while being overtaken.
Seatbelts, Helmets, and Safety
Seatbelts
- Seatbelts are compulsory for all occupants of a moving vehicle.
- The driver is responsible for ensuring all passengers wear seatbelts, front and rear.
- Children between 3 and 14 years (unless taller than 1.5 m) must sit in the back seat if the front seat does not have a seatbelt fitted.
- If seatbelts have been removed, the vehicle may not be used on a public road.
- If there is a vacant seat with a seatbelt fitted, no one may occupy a seat without a seatbelt.
- You may unfasten your seatbelt while parking, reversing, and during the yard test.
Helmets
- You may not ride a motorcycle, or be a passenger on a motorcycle or in a sidecar, on a public road without wearing a protective helmet.
Emergency Triangles
- At least one double-sided reflective triangle (meeting SABS specifications) must be carried in all motor vehicles. Motor cars first registered before 1 July 2006 are exempted.
- In an emergency, the triangle must be displayed at least 45 metres behind the vehicle, facing approaching traffic.
Use of the Hooter
- Use only to warn other road users in an emergency.
- Do not use unnecessarily or within 100 m of a noise prohibition sign.
Towing
- The towing connection must be safe and secure.
- The distance between the towing vehicle and the towed vehicle must not exceed the prescribed limit.
- The towed vehicle must have its lights on if being towed at night.
- Articulated vehicles can jackknife when brakes are applied sharply — increase following distance when towing.
Accidents
In the event of an accident involving a vehicle, person, animal, or property:
- Stop the vehicle immediately.
- Check for injuries and provide any assistance possible to the injured.
- Provide your details: name, address, address of the vehicle owner, and vehicle registration number.
- Report the accident to the police within 24 hours.
If someone is killed during the accident:
- Call the emergency services immediately.
- Do not move the vehicles unless they are blocking the road or causing potential danger, and only after their positions have been marked on the road surface.
Alcohol and Drug Limits
| Driver Type | Blood Alcohol Limit | Breath Alcohol Limit |
|---|---|---|
| Ordinary driver | 0.05 g per 100 ml of blood | 0.24 mg per 1 000 ml of breath |
| Professional driver | 0.02 g per 100 ml of blood | 0.10 mg per 1 000 ml of breath |
Additional General Duties
- Do not travel backwards further than is necessary.
- Do not follow another vehicle too closely.
- Do not allow another person or animal to interfere with your control of the vehicle.
- Do not leave the vehicle unattended without setting the parking brake.
- Do not leave the engine running if the vehicle is unattended.
- Do not allow any portion of your body to stick out of the vehicle (except for hand signals).
- Do not drive, pull, or push a vehicle onto a pavement.
- Always give way to emergency vehicles.
Tyres
- Tread pattern must be clearly visible with a depth of not less than 1 mm across the tyre's entire width and circumference.
- Motorcycles under 50 cc must have tread visible on at least 80% of tread width.
- Sidewalls must not have deep cuts and inner cords must not be visible.
Number Plates
- All vehicles must be fitted with SABS-approved number plates mounted upright or within 30 degrees of upright.
- Motorcycles, motor-tricycles, and trailers must have one plate at the back. All other vehicles must have plates front and back.
- Each letter and figure must be clearly legible and readable from at least 20 m.
Chapter 8The Driving Test (K53 Practical)
Test Overview and Scoring
The K53 driving licence test is a practical test to determine your ability to control a vehicle and apply the K53 defensive driving system in all aspects of driving.
Test Components
- Pre-trip inspection of the vehicle's roadworthiness
- The yard test (manoeuvres)
- The road test (driving on public roads)
Time Limits
- Yard test: 20 minutes and 59 seconds (including pre-trip inspection)
- Road test: Minimum 20 minutes, up to 45 minutes
Immediate Failure Items
The test is stopped immediately if you:
- Use a vehicle that is not roadworthy or not licensed
- Have a mechanical failure
- Make an uncontrolled or dangerous action
- Are involved in a collision you could have avoided
- Fail to complete a manoeuvre within the allocated number of attempts
- Allow the vehicle to roll forward or backward (during yard manoeuvres)
- Fail to demonstrate a hand signal correctly when instructed
- Exceed the 20-minute time limit for the yard test
- Exceed 50 penalty points for the yard test
- Exceed 8 penalty points per minute during the road test
Penalty Points (Road Test)
- Not checking mirrors every 5-8 seconds: 5 points
- Not checking blind spot: 5 points
- Not signalling intention: 5 points
- Signal not cancelled: 4 points
- Not checking mirrors before manoeuvre: 3 points
- Braking errors: 2 points
- Not showing courtesy: 1 point
- Looking in mirrors too long: 1 point
Pre-Trip Inspection
Exterior Inspection
- Check under the vehicle for any leaks and obstructions.
- Unlock all doors and ensure opening mechanisms and window winders work.
- Check seatbelts are secure and mechanisms work.
- Beginning at the right front door, inspect the roadworthiness of the vehicle.
- Check wiper blades for wear and leave them extended.
- Ensure the licence disc is valid.
- Mention that spare wheel, jack, and wheel spanner should be checked.
Interior Inspection
- Ensure parking brake is applied.
- Ensure gear lever is in neutral (P or N for automatic).
- Check for obstructions.
- Check warning lights and gauges.
- Check seat adjustment for correct driving position.
- Check all mirrors for maximum rear-view vision; adjust as necessary.
- Turn ignition key to ON without starting engine.
- Check electric windows if applicable.
- Check all instruments and mention any changes.
- Check operation of front and rear lights, indicators, horn, and wipers.
- Check steering for excessive free play.
- Check pressure on brake and clutch pedals.
- Return wipers to normal position.
- Check doors are properly closed.
- Ensure passengers know how to operate seatbelt release mechanisms.
The Yard Test
The yard test manoeuvres test your competence in handling the vehicle while reversing, parking, and moving off on inclines. The examiner will guide you to each starting point.
Starting Procedure (Every Manoeuvre)
- Ensure parking brake is applied.
- Ensure gear lever is in neutral.
- Check gauges and warning lights are normal.
- Turn ignition to ON without starting.
- Check warning lights for malfunction.
- Start the engine.
- Release key as soon as engine starts.
- Check warning lights and gauges again.
Incline Start
- Stop where indicated without rolling back.
- Apply parking brake.
- Select neutral.
- Check mirrors.
- Check blind spot if applicable.
- Signal if applicable.
- Select 1st gear.
- Obtain clutch control (find the biting point).
- Check mirrors and both blind spots.
- Release parking brake.
- Move off without rolling back.
- Cancel signal if applicable.
Parallel Parking (Light Motor Vehicles)
- Check mirrors.
- Check kerbside blind spot.
- Signal to the kerbside.
- Select reverse gear.
- Obtain clutch control.
- Check mirrors and both blind spots.
- Release parking brake.
- Move backwards.
- Before turning, check the roadside blind spot.
- Steer into the parking bay without touching obstacles or mounting the kerb.
- Counter-steer if a second movement is required.
- Stop within the demarcated area.
- Apply parking brake.
- Select neutral.
- Cancel signal.
Notes: Only three movements are permitted (one reverse, two additional). Turn the steering wheel immediately before coming to a stop, not while stationary.
Three-Point Turn / Turn in the Road (Light Motor Vehicles)
Turn the vehicle around within a 12 m roadway using three movements:
- Forward: Check mirrors, check right blind spot, signal right, select 1st, check again, release brake, move forward turning right as far as possible, counter-steer left before stopping.
- Reverse: Check mirrors, check left blind spot, signal left, select reverse, observe 360 degrees, release brake, reverse turning left, counter-steer right before stopping.
- Forward: Check mirrors, check right blind spot, signal right, select 1st, observe 360 degrees, release brake, move forward steering left, cancel signal.
Alley Docking (Reversing into a Bay)
- Check mirrors, check blind spot on the bay side.
- Signal towards the bay.
- Select reverse, obtain clutch control.
- Observe 360 degrees.
- Release parking brake, move backwards.
- Check opposite blind spot before turning.
- Steer into bay.
- Stop when completely within the bay.
- Apply parking brake, select neutral, cancel signal.
The Road Test
After completing the yard test, you proceed to public roads. The examiner evaluates your ability to apply K53 defensive driving in real traffic conditions.
Key Road Test Procedures
Lane Changing:
- Check mirrors, check blind spot, signal.
- Check blind spot again.
- Steer into the next lane when safe.
- Position vehicle in the new lane.
- Cancel signal.
Turning Left at an Intersection:
- Check mirrors, check left blind spot, signal left.
- Check left blind spot, steer to left of lane.
- Check mirrors, decelerate/brake if needed.
- Select lower gear if needed.
- Yield to pedestrians.
- Observe 360 degrees, check left blind spot.
- Steer round the corner into appropriate lane.
Turning Right at an Intersection:
- Check mirrors, check right blind spot, signal right.
- Position vehicle to immediate left of the centre of the intersection.
- Check mirrors, decelerate/brake if needed.
- Keep wheels straight while waiting to turn.
- Observe 360 degrees.
- When safe, steer into appropriate lane.
Emergency Stop:
- When the examiner says "STOP!", apply the service brake immediately.
- Bring the vehicle to a controlled stop in the shortest distance possible.
- Do not lock the wheels.
Traffic Circles:
- Large circle (roundabout): Check mirrors, check left blind spot, signal left, reduce speed, select suitable gear, check left blind spot, enter keeping left of circle, signal left to exit, cancel signal, check mirrors, accelerate.
- Mini-circle: Same basic procedure but at lower speed. Yield to traffic that reaches their yield line first. Drive around (not over) the mini-circle.
Code-Specific Driving Test Requirements
Motorcycle Yard Test (Code A1/A / old Code 1/2)
In addition to standard K53 procedures, motorcycle licence tests include the following yard manoeuvres:
- Figure-of-Eight: Ride a controlled figure-of-eight pattern within marked cones at low speed, demonstrating balance and steering control.
- Slow Ride: Ride as slowly as possible in a straight line without putting a foot down, demonstrating balance at very low speeds.
- Emergency Stop: Apply both front and rear brakes simultaneously in a controlled manner when the examiner signals STOP, stopping within the marked zone.
- U-Turn: Execute a U-turn within a marked area, demonstrating the ability to turn the motorcycle in a confined space.
Heavy Vehicle Yard Test (Code C1/C / old Code 10/13)
Heavy vehicle tests include an extended pre-trip inspection and specific manoeuvres:
- Extended Pre-Trip Inspection: Includes all standard checks plus: air brake build-up test, checking air pressure gauges, testing the park brake under load, checking all light clusters and reflectors, inspecting tyres on all axles, and checking all mirror positions.
- Alley Docking: Reverse the large vehicle into a marked bay (alley) using mirrors, demonstrating control of the vehicle's longer wheelbase and rear overhang.
- All standard yard manoeuvres (incline start, parallel park) are performed with the heavier vehicle.
Articulated Vehicle Test (Code EC / old Code 14)
Tests for articulated vehicles (semi-trucks with a trailer) include additional procedures:
- Coupling Procedure: Correctly couple the tractor unit to the semi-trailer, including connecting the air lines (red emergency line first, then blue service line) and the electrical connector, and confirming the fifth wheel is locked.
- Uncoupling Procedure: Safely uncouple the trailer, including supporting the trailer on its landing legs, disconnecting all connections in the correct order, and confirming safe separation.
- Reversing with Trailer: Reverse the articulated combination into a marked area or alley, demonstrating control of the jack-knife angle between the tractor and trailer.
Chapter 9South African Licence Codes
South Africa uses a letter-based licence code system. Older driving licences issued before the current system use numerical codes. This chapter provides a complete reference of all codes, including the old numbered equivalents you will encounter on older cards and in everyday conversation.
Licence Code Conversion Table
| Old Code | New Code | Vehicle Type | Weight / Size | Includes | Min Age |
|---|---|---|---|---|---|
| Code 1 | A1 | Light motorcycles | Up to 125 cc engine | — | 16 (learner) / 17 |
| Code 2 | A | All motorcycles | Any engine capacity | A1 | 18 |
| Code 7 | B | Light motor vehicles | GVM up to 3 500 kg | — | 17 (learner) / 18 |
| Code 8 | EB | Light vehicle + heavy trailer | GVM up to 3 500 kg; trailer over 750 kg | B | 18 |
| Code 10 | C1 | Medium-heavy vehicles | GVM 3 501–16 000 kg | B | 18 |
| Code 11 | EC1 | Medium articulated vehicles | GCM 3 501–16 000 kg | B, EB, C1 | 18 |
| Code 13 | C | Heavy rigid vehicles | GVM over 16 000 kg | B, C1 | 18 |
| Code 14 | EC | Heavy articulated vehicles | GCM over 16 000 kg | All except A codes | 18 |
Learner's Licence Codes
When you apply for a learner's licence, you must select one of three codes. The theory test questions are specific to the code you choose:
| Learner Code | Covers | Leads To |
|---|---|---|
| Code 1 | Motorcycles (all) | Driving licence Code A1 or Code A |
| Code 2 | Light motor vehicles (most common) | Driving licence Code B (old Code 7) or Code EB (old Code 8) |
| Code 3 | Heavy and extra-heavy vehicles | Driving licence Code C1 (old Code 10), C (old Code 13), EC1 (old Code 11), or EC (old Code 14) |
Professional Driving Permit (PrDP)
A PrDP is required in addition to a driving licence when driving professionally. It is not a replacement for a driving licence — it is an additional permit. There are three PrDP categories:
| Category | Code | Use | Minimum Age |
|---|---|---|---|
| Goods | G | Transporting goods for reward | 18 years |
| Passengers | P | Transporting passengers for reward (e.g., taxi, bus) | 21 years |
| Dangerous Goods | D | Transporting dangerous goods (fuel, chemicals, explosives) | 25 years |
Chapter 10Quick Reference and Exam Tips
Speed Limits Summary
| Zone | General Limit |
|---|---|
| Urban (built-up) | 60 km/h |
| Rural (open road) | 100 km/h |
| Freeway | 120 km/h |
| Residential area (Woonerf) | 30 km/h |
| Pedestrian priority area | 15 km/h |
| Heavy vehicles (>9 000 kg GVM) | 80 km/h max |
| Vehicles towing trailers/caravans | 100 km/h max |
Parking and Stopping Distances
| Distance | From |
|---|---|
| 5 m | Intersection |
| 6 m | Pedestrian crossing / Bridge / Constricted road / One-vehicle-width structure |
| 9 m | Railway crossing |
| 1 m | Next to another parked vehicle (at a demarcated bay) |
| 1.5 m | Fire hydrant / Driveway entrance |
| 12 m | Lit street lamp (for parking without lights at night) |
| 45 m | Emergency triangle placement behind vehicle |
| 100 m | Main beam must illuminate objects ahead |
| 45 m | Dipped beam must illuminate objects ahead |
| 150 m | Minimum visibility to drive without headlights |
Following Distance Quick Reference
| Vehicle | Absolute Minimum | Recommended |
|---|---|---|
| Light Motor Vehicle | 2 seconds | 3 seconds |
| Heavy Motor Vehicle | 3 seconds | 6 seconds |
| Motorcycle | 3 seconds | 4-5 seconds |
Alcohol Limits Quick Reference
| Driver Type | Blood | Breath |
|---|---|---|
| Ordinary | 0.05 g / 100 ml | 0.24 mg / 1 000 ml |
| Professional | 0.02 g / 100 ml | 0.10 mg / 1 000 ml |
Key Numbers to Remember
| Item | Value |
|---|---|
| Learner's licence validity | 18 months |
| Minimum tyre tread depth | 1 mm |
| Emergency triangle distance | 45 m behind vehicle |
| Check mirrors frequency | Every 5-8 seconds |
| Overtaking prohibition distance | 500 m from sign |
| Max parking distance from kerb | 450 mm |
| Motorcycle handlebar width (200cc+) | 600-800 mm |
| Vehicle turning radius (max) | 13.1 m |
| Yard test time limit | 20 min 59 sec |
| Road test minimum time | 20 minutes |
| Number plate visibility | 20 m |
| Brake light visibility | 30 m |
| Accident report deadline | 24 hours |
Day-Before-Exam Checklist
- Review all road signs one final time, focusing on regulatory signs.
- Go through the speed limits and parking distances tables.
- Review the hand signals (left turn, right turn, stop, slow down, overtake).
- Review the vehicle controls and their functions.
- Take one final practice test at k-53.co.za to check your readiness.
- Prepare all documents (ID, passport photos, eye test, payment).
- Get a good night's sleep.
- Plan your route to the testing centre and allow extra time.
What to Bring to the Testing Centre
- Valid South African ID (book, card, or valid passport)
- Two recent passport-sized photographs
- Valid eye test result (from the centre or your optometrist)
- Testing fee (cash or card, depending on the centre)
- Completed application form LL1 (available at the centre)
- A pen
- Patience — testing centres can be busy